


Create art on your own computer using artificial intelligence. No need to pay for Midjourney, Dall-E or any services online

Representation pic
AI is all the rage these days, but beyond a certain free tier, you must pay for services like MidJourney, Dall-E and ChatGPT. Fortunately, a few companies are determined to make AI technology open-source and free. One such outfit is Stable AI.
ADVERTISEMENT
They are working on several aspects of generative AI, including AI Art, 3D models and Chat. Most are work-in-progress projects requiring significant computer skills to install and run.
However, being supported by the community, on the whole, has meant that members of the public have taken the initiative to simplify the installation and configuration of these projects to the point that
most casual users can install and run these amazing programs on their home computers.
We will install and run Stable Diffusion today with one of these pre-packaged one-click install projects. With a few pointers on what everything does and how you can get great results on your first try.
Software requirements
>> I will share instructions on installing this on a Windows PC. For installation on macOS or Linux, check out instructions on the project’s Github Page: https://github.com/vladmandic/automatic.
>> Before installation of Stable Diffusion, you need these software packages installed on your PC:
1 Python: Install it from the link provided; you must install Python 3.10.6. The newer versions don’t work well with this distribution of Stable Diffusion. https://bit.ly/smdpython3106.
2 GitHub For Windows: This will let you clone and update the program to the latest version without reinstalling Vlad diffusion and losing all your settings. https://gitforwindows.org.
3 Register and get an account on GitHub. It is free.
4 Nvidia Cuda Toolkit: If you have an Nvidia card, you need to install this. It gives the program access to the GPU’s processing power. Download the local version. https://bit.ly/smdcuda.
5 Vlad Diffusion: This is the Github repository we will be using to install and run Stable Diffusion. There are a few other similar projects but I found this one to run and install well with minimum effort. https://github.com/vladmandic/automatic.git.
How to get the best art
Prompting UI art is an art— research online for Stable Diffusion Prompts. Even if your prompt is good, the machine might throw up wonky results, so run your prompts several times to get the output you desire.

Prompt and generate Use negative prompts to remove things you don’t want to see. For example, unclear eyes, low res, bad proportions, deformed, extra limbs and tentacle finger are great negative prompts. Trust me, you don’t want to see tentacle fingers.
Hardware Requirements
>> AI is very GPU intensive and will require a significantly robust graphics card with at least 4GB of Video RAM. However, a minimum of 8GB is recommended.
>> You should also get an Nvidia GPU, as the program we will be using already has pre-sets for optimisations. The program will run on AMD and Apple Silicon but will not be optimised.
>> The machine should have 8GB or more RAM, 16GB is recommended and around 50 GB of Hard Drive space.
>> You have to be connected to the Internet during installation.
Installation
Installation is fairly simple.
1 Start by installing Python from the provided link.
2 Install Github for Windows, the latest version.
3 Install Nvidia Cuda toolkit if you have an Nvidia GPU. You can skip this step if you are not using an Nvidia graphic card.
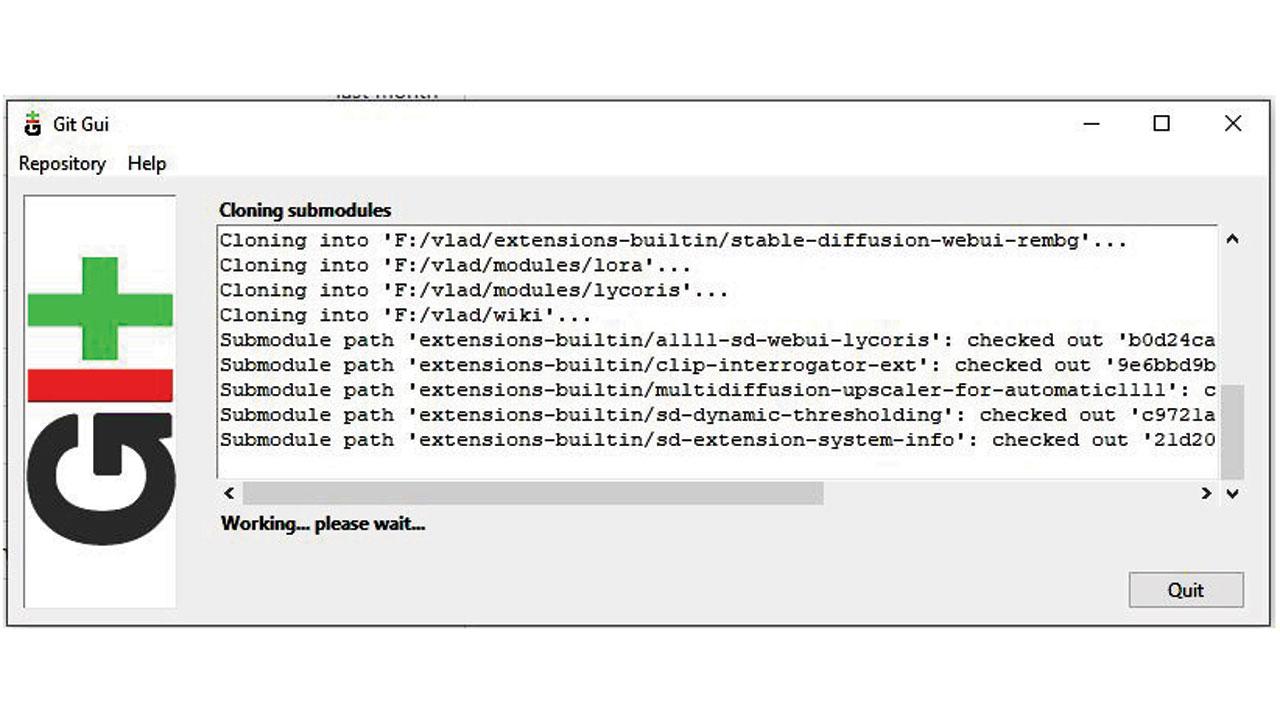
4 Run Git GUI and click on Clone a repository. In the Source Location, put down: github.com/vladmandic/automatic.git and put in the target drive on your computer with at least 50GB of space. You will want to put in a folder name that doesn’t exist—for example, f:\vlad, GitGUI needs to create the directory to install, or else it gives an error. You don’t need the 50GB initially, but as time goes by, you will want to install various plugins, and they will need hard drive space. Git GUI will ask you to log in to your GitHub account before it starts cloning.
5 Once the cloning process is done. Open the directory where it was cloned and double-click on WebUI.bat. It will open a command prompt window and start the installation. You don’t need to do anything else just wait for it to be done. The required files will be downloaded, so installation time will depend on your Internet speed.
6 Once the installation is done, rerun WebUI.bat. This will open another command prompt, this time running the program. You have to leave this window open throughout your Stable diffusion session.
7 To run, open your browser and type in 127.0.0.1:7860/. Remember that the command prompt opened by WebUI.bat should be running while you use Stable Diffusion.
8 Enter your prompt.
9 Once you get the image you are looking for, select it and scale it up using process image. You are done.
10 There are various things to explore here but take your time and experiment. That’s what’s fun about it.
 Subscribe today by clicking the link and stay updated with the latest news!" Click here!
