


Looking for a unique rangoli design that lasts for the entire festival season? Paper florist Uurmi Bhatia has the upaay for you

Uurmi Bhatia
Imagine a rangoli that lasts for days even after Diwali is over—and one that you can reuse every year. While traditional rangolis chalked in colourful patterns last only as long as the wind—or fidgety kids and nosy pets—permit, paper rangolis like paper florist Uurmi Bhatia’s creations can be featured year after year.
ADVERTISEMENT
The paper florist is vocal about the love and dedication that goes into crafting paper flowers. The love of crafting runs in the family; it was Bhatia’s mother who instilled a love for paper crafts in her. Be it paper flowers, stained glass paintings, oil paintings, baking, or embroidery… her mother taught it all. “We were four sisters, and all of us have taken up some form of artwork, as a legacy,” she smiles.
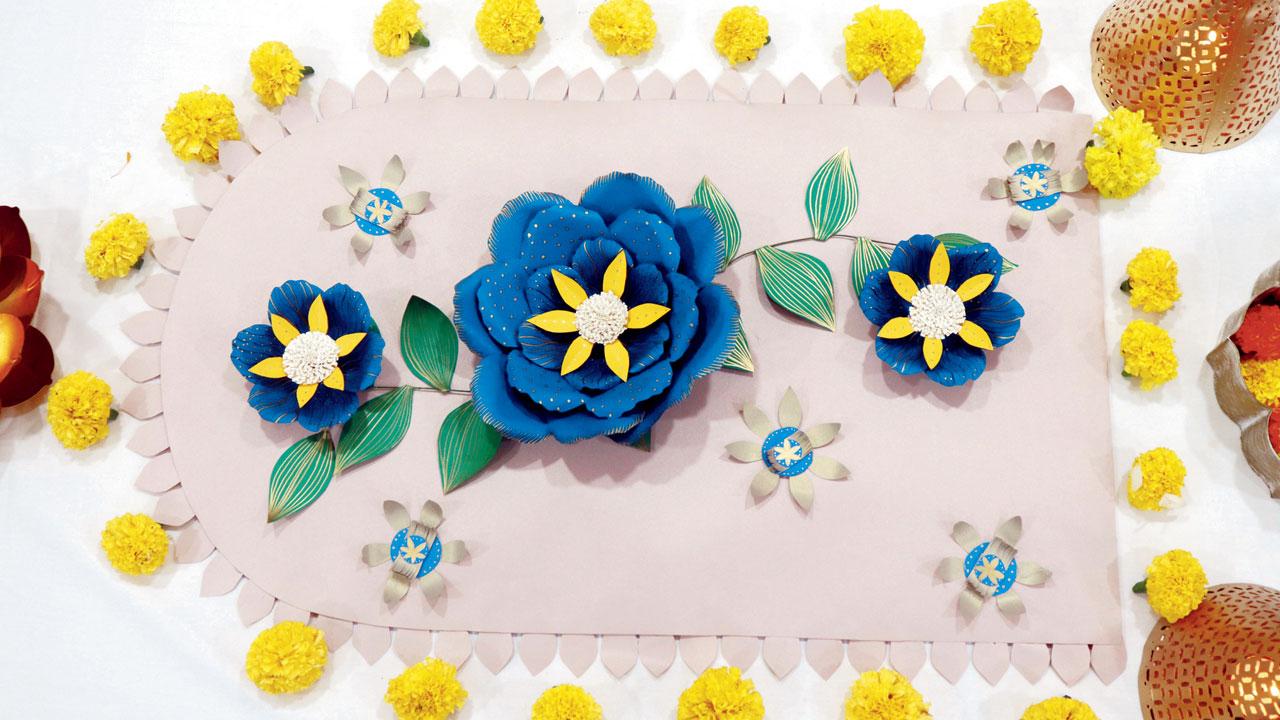
This paper rangoli created by paper florist Uurmi Bhatia can be made using a few sheets of chart paper, as a twist on the traditional chalk rangoli. Pics/Anurag Ahire
Creating paper flowers was the first thing she learned from her mother as a child, an activity she’s been involved with for the past 30 years. Mi Ikigai, her paper floral art platform which she runs out of her home in Sion, was founded six years ago with the purpose of turning her passion into a formal profession. Ask her how she captures the intricacies of nature into her detailed paper works and she says, “Paper is so versatile—there is so much you can do with it.” To get the look of the flower right, she studies the flower if it’s available with florists near her, or else looks up images online. “The idea is to de-construct the entire flower, petal by petal, and read about where it comes from, what the petals’ textures are like, and how its colours appear.”
Crafting paper flowers requires patience and a lot of time. “Take a paper hydrangea, for example; each one would take around three to four hours to make from scratch,” she explains. “Commissions for paper flowers take anywhere between 10 days to a month to complete.” For the paper rangoli she’s conceptualised specially for mid-day, Bhatia says she’s come up with a design that anyone can replicate. “It was interesting to come up with a paper rangoli, which I’ve never done before,” she tells us, as she prepares to put together the deep-blue flowers for the rectangular rangoli design. While Indian crepe paper, also known as doublet crepe paper, is what she normally works with, she’s created the paper flowers using card stock paper aka what we colloquially call chart paper.
“For the flowers, I’ve added gold lines and patterns inspired from Indian textlies, because we believe that wearing a lot of gold during our festivities attracts abundance,” she says. “The rangoli, if stored properly, can last for about two years.” Paper rangolis are not only easier to maintain, Bhatia feels, but also a creative outlet for expressing gratitude towards nature. The beauty of natural flora inspires the paper florist, of course, in an art form like hers that draws closely from the natural world. “Crafting paper flowers is an overwhelming process, because you’re trying to mimic nature, which is already so perfect,” she explains. “Personally, roses are my favourite. Every time I make a paper rose, I fall in love with the real thing.”
How to create a paper rangoli
Step 1
You’ll need about two to three sheets of 120 GSM thickness, depending on the number of flowers you need to make. Keep a gold marker, floral wires, and a glue gun handy as well.
Step 2
Cut out the leaves and petals as per your requirements. The size of the petals should be according to the number of layers you need: if you are doing a three-layered flower, ensure that the petals of each layer are different sizes.
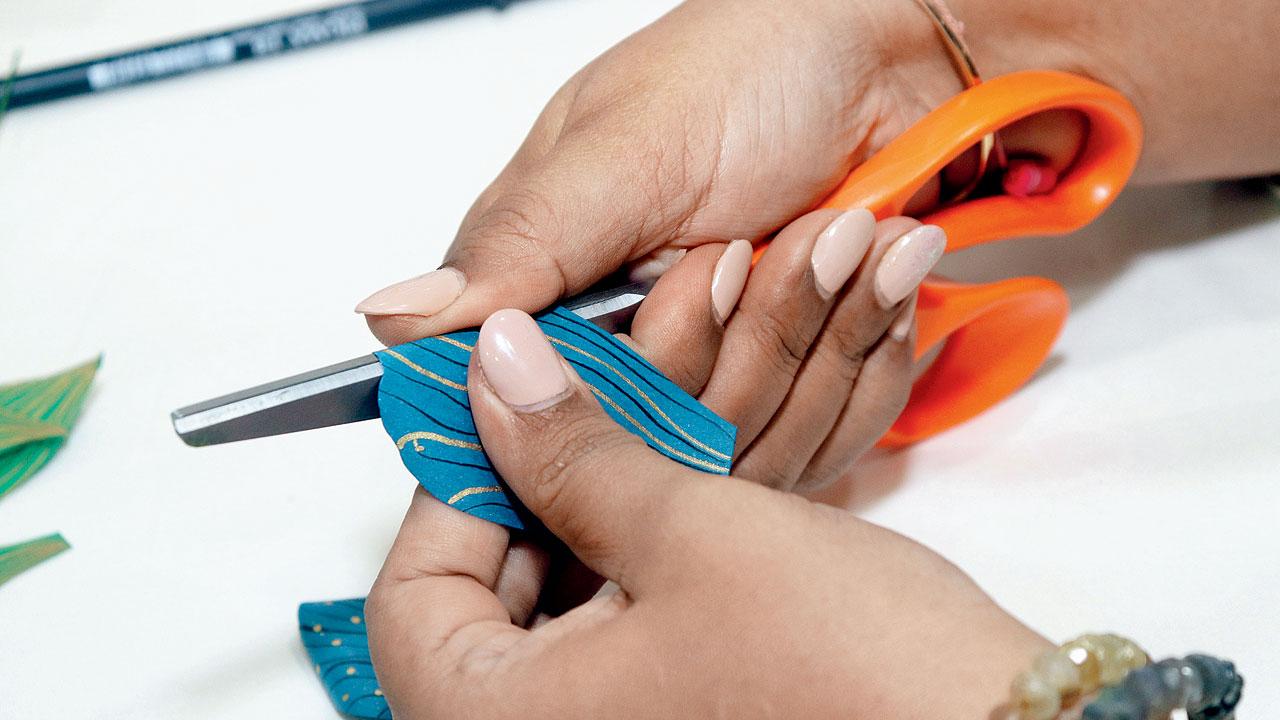
Step 3
Curl the edges of the petals with the blades of a closed scissor. Be gentle so that you don’t end up ripping the paper!
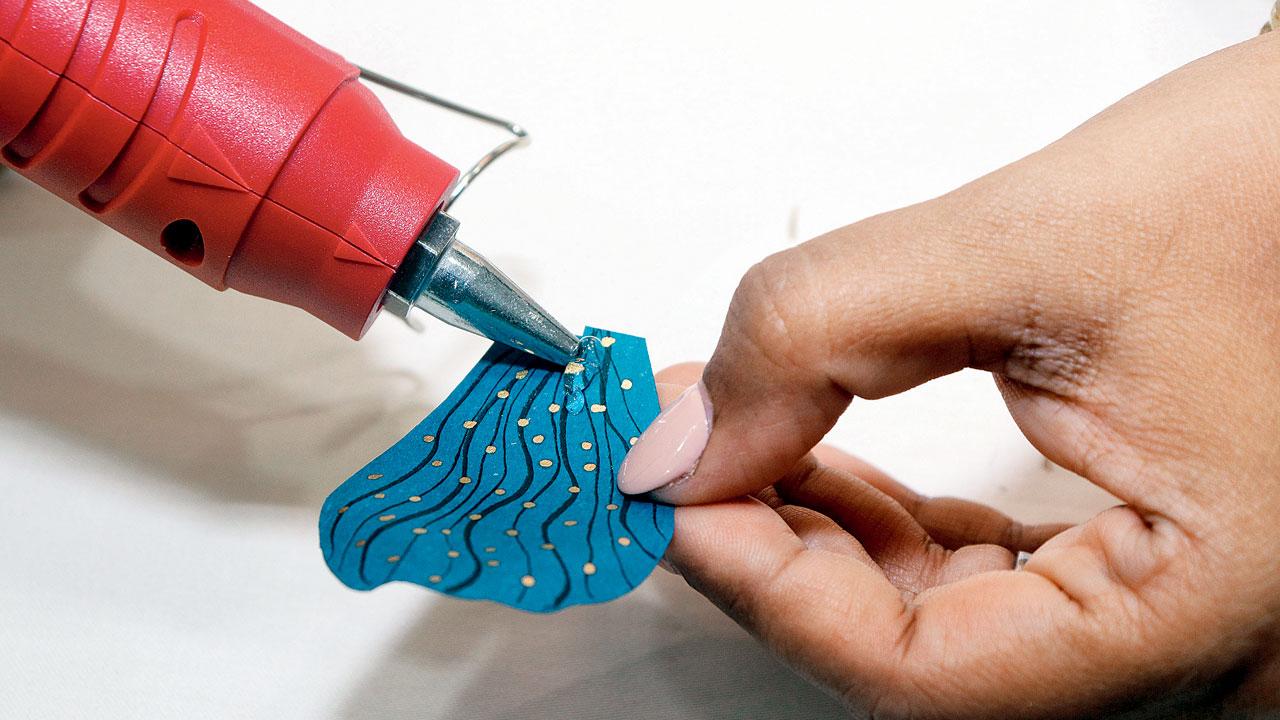
Step 4
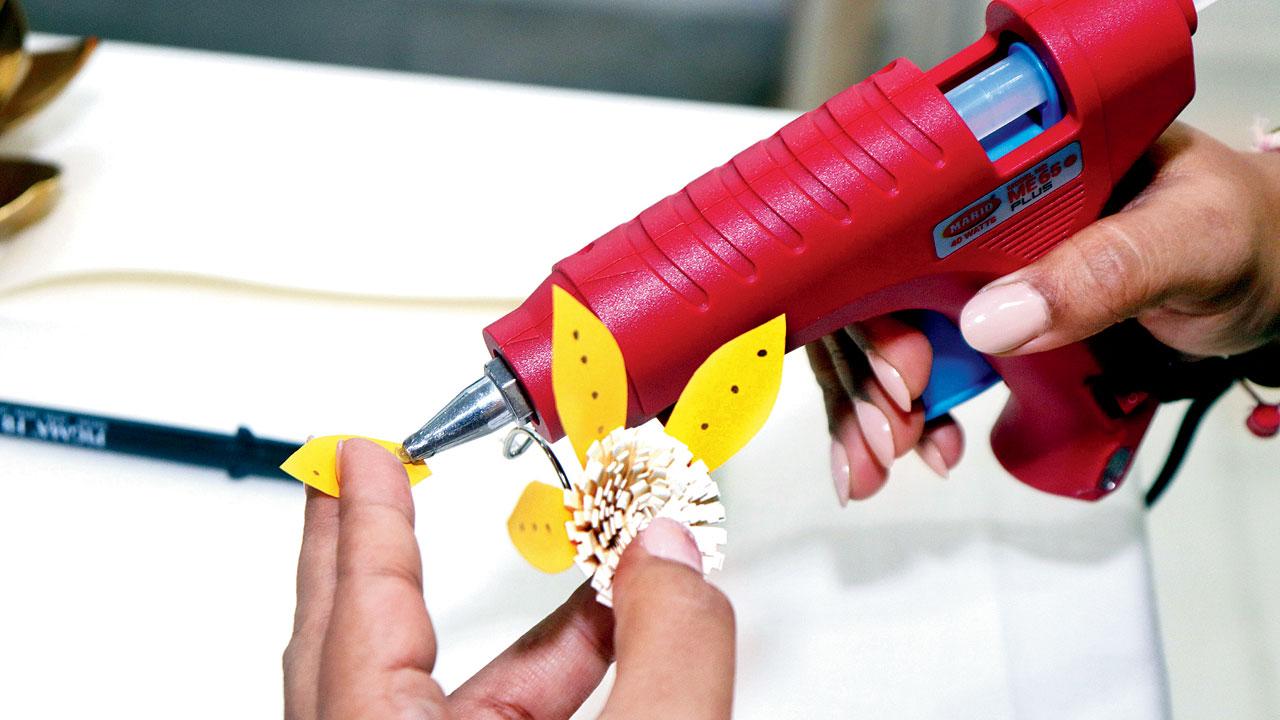
Slit the petal in the middle and use the glue gun to stick one edge over the other, so that it gains a curved shape like a real petal.
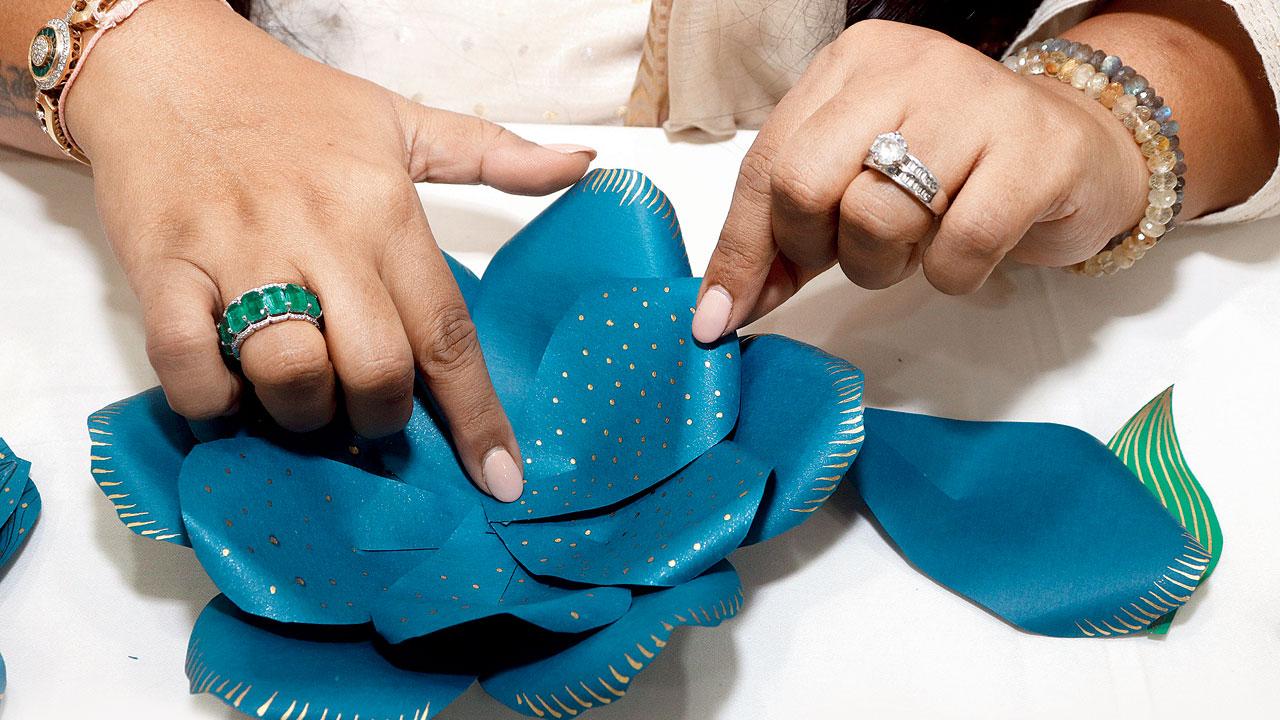
Step 5
Start pasting the petals on a circular base, each subsequent petal slightly overlapping the other. Start with the largest layer of petals and then move onto the smaller layers.
Step 6
For the flower’s centre, fold a piece of cardstock paper in half lengthwise and make incisions along the folded edge. Then, start rolling the cut paper around itself, and glue it to the centre of the flower.
Step 7
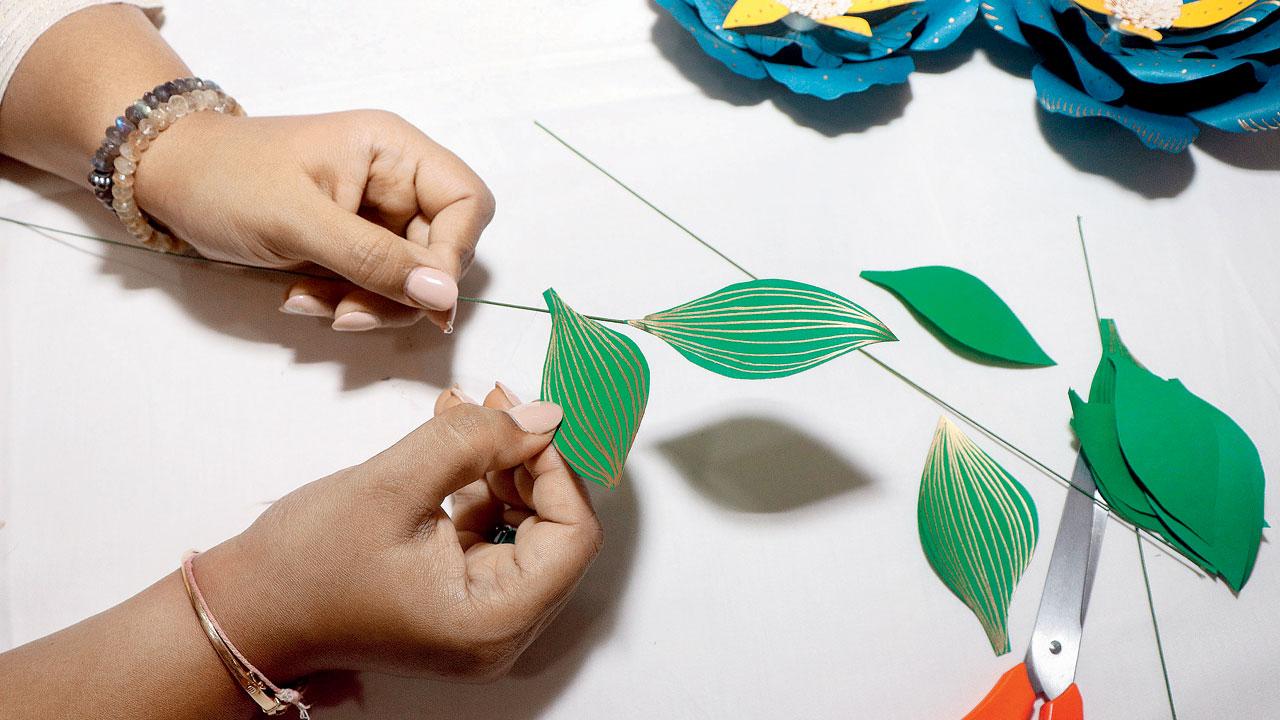
Once you’re done with the flowers, glue the leaves to the floral wire. Add as many leaves as you want without cluttering the stem.
Step 8
For the final decorations, add marigolds in patterns as you like, or any real flowers you feel like adding to enhance the decoration. Add double-sided tape to the underside of the rangoli to keep it in place.
 Subscribe today by clicking the link and stay updated with the latest news!" Click here!
